JupyterLab用户指南12:调试器

Debugger调试器
JupyterLab 3.0现在默认附带调试器前端。这意味着notebook、代码控制台和文件现在可以直接从JupyterLab调试!
需求
为了使调试器启用并可见,需要一个支持调试的内核。目前,xeus-python是Python唯一支持调试的Jupyter Kernels。但是,通过实现Jupyter调试器协议,其他Jupyter Kernels也可以支持调试并通过实现Jupyter Debugger Protocol与JupyterLab调试器兼容。要在新的conda环境中安装xeus-python:
conda create -n jupyterlab-debugger -c conda-forge jupyterlab=3 xeus-python
conda activate jupyterlab-debugger
使用
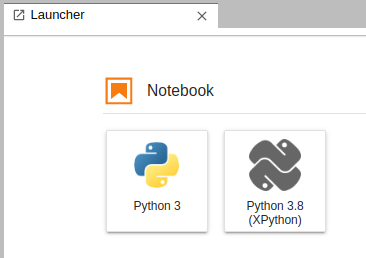
xeus-python can be selected from the JupyterLab launcher:
xeus-python 可以从JupyterLab启动器中选择:
或者,也可以使用内核选择对话框切换到xpython内核:
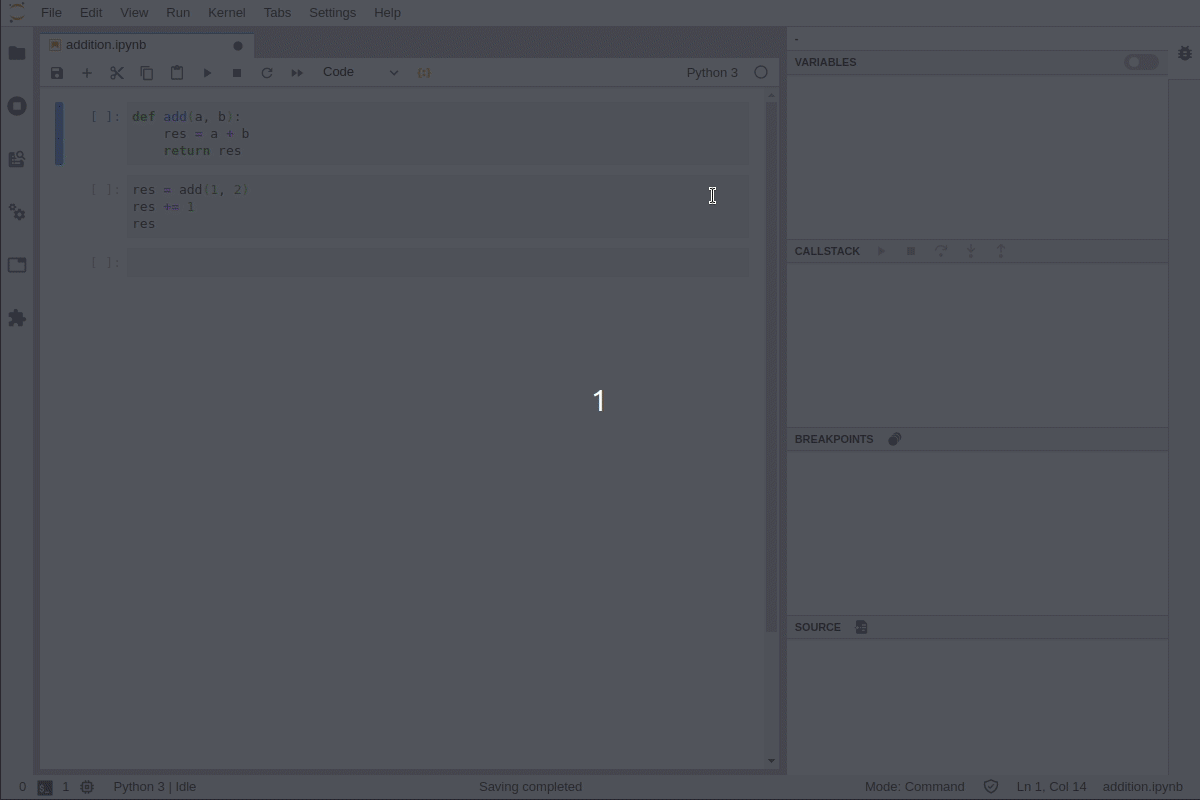
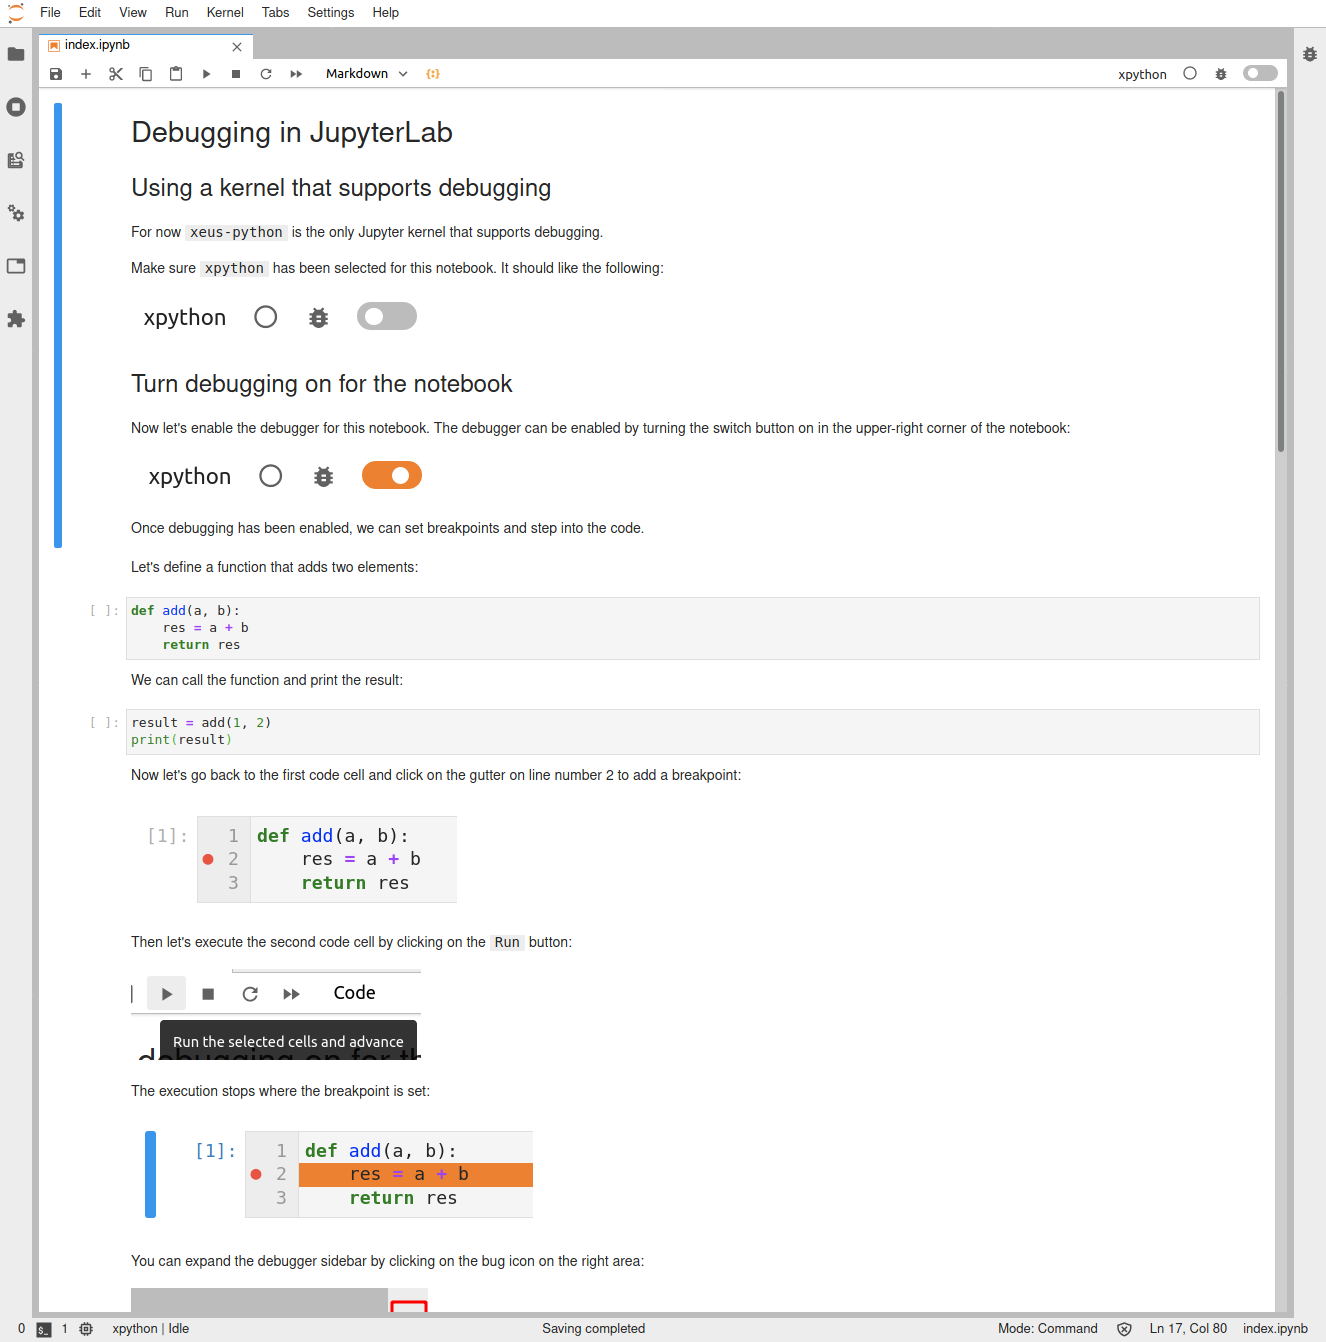
启用调试器,设置断点并进入代码:

notebook教程
还有一个教程notebook,用于尝试在jupyter-ide-demo repo.中可用并且可以在Binder上运行的调试器。